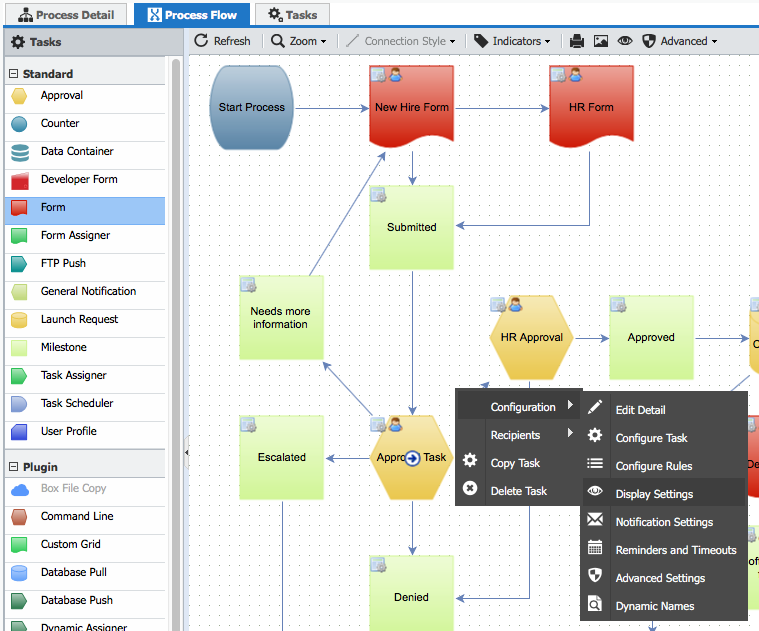
The Display Settings for any task impacts either how the task is displayed in the Request Detail or as an open task.

There are 4 items to manage:
- Priority Indicators
- Only showing the task tab for the task recipient(s)
- Selecting the Request Detail Template
- Entering Recipient Help for their task
Priority Indicators
By assigning a priority to a task it will color code the task for the end user on his/her for any widget that displays open tasks.

Note: A task can only have one priority associated with it.
To assign a priority to your task simply select on of the three priority values from the Priority list:

Select Save Display Settings when complete.
Only Show Task Tab (Hide summary, flow and comments)
By default, this will be unchecked so every task will have include tabs for the Request Detail, the Request Flow View and Comments that the task recipient can access. Check this option if you want the task recipient(s) to only see and complete the task without seeing the request's details, flow view or having the ability to see and add comments.

Request Detail Template
By default, when a process is created, an Integrify style template is selected and is subsequently applied to all tasks created within that process. However, for each task it is possible to select a different Integrify style template and control how the Request Detail is displayed to the recipient(s) who is assigned to complete the task.

For example, for all tasks, with the exception of say a VP Approval task you could use the style sheet called Forms on Top. For that particular VP Approval Task you could apply a different style sheet so that VP could have a slightly altered view of all of the information in the Request Detail. Or, you may have a process with a lot of file attachments in forms and need someone that is reviewing and completing a task to easily see all the file attachments that were made. If so, you may want to select the Two Column, Form, Attachments, History template so the attachments are easily accessible in their own column.
Recipient Help
For any non-system task (such as a Form or Approval task) you may add additional help text. This help text will be display just above the task to be completed:

To add help text, just add type the information in the Recipient Help editor and press Save Display Settings when complete.
The help text will be displayed the next time that task executes.

Comments