Leverage existing work and harness the power of Excel on the users’ desktop while utilizing Integrify to manage the workflow often associated with capital expenditures, expense reports, or similar financial functions.
Below is a step-by-step guide on how to configure the Excel Import task. We have also prepared a video to help.
Through Integrify’s intuitive process definition interface, Process Administrators can build a process that enables users to:
- Upload an Excel spreadsheet into a process.
- Define business rules based on data within the cells of the uploaded Excel document.
- Use the Excel data to define approval routing rules within the process.
- Dynamically assign approvers based on excel data.
- Incorporate Excel data along with process information within Integrify reports.
We'll take you through an example of adding and configuring an Excel Import task to a process. Add an Excel Import task to your Process Flow and then choose Configure Task from the task menu:

At this point, we are looking to map an Excel spreadsheet's available cells to fields in an Integrify web form that we previously created in the Integrify Forms section. With an Excel Import task configuration (as shown below), we will now have the option to upload the Excel spreadsheet that you want to import. Note: For users completing this Excel Import task upon execution, they will be presented with a file attachment question. The user will only need to attach the same Excel spreadsheet as the one being configured here.

We'll upload the below example Excel spreadsheet:

We left some fields completed by way of example. A user will need to have completed the Excel spreadsheet prior to attaching the file when completing the Excel Import task.
Once we have uploaded our Excel file, we then need to select which form from the Integrify Forms section that we want to map to:

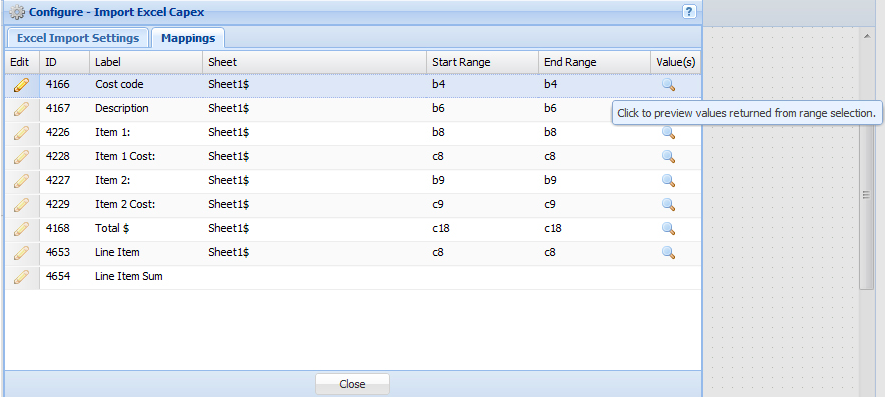
Once we have selected the form to map the Excel spreadsheet to, we need to select 'Save'. Once the settings are saved, we then select the 'Mappings' tab so we can then map cells from the Excel spreadsheet to the web form:

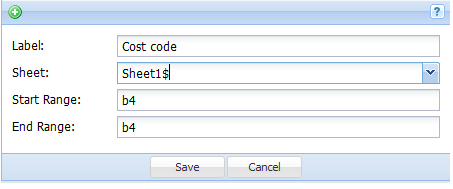
The Integrify web form we choose includes the fields in the 'Label' column. In the 'Sheet' column, we can see all the sheets if the imported Excel spreadsheet. We then select the sheet and add the 'Start Range' and 'End Range' of the cells we want to import into the appropriate field in our web form. In this example, we are adding the B4 cell from the Excel spreadsheet to the 'Cost Code' field in the web form:

Once we have mapped the cells we want from the Excel spreadsheet into the Integrify web form, we can optionally preview the value that will be imported by selecting from the 'Value' column for the field we want to preview:

Now, let's show how an approval task can be triggered based on the dollar amount from the 'Total' field in the Excel spreadsheet that will be attached by the task completer.
First, we added an Approval Task to the process. We then select 'Configure Rules' from the Approval Task's Task Menu. We can now add to the start rules of the VP Approval task so we include the data from the 'Total' field in the web form that was configured in the Excel Import task.

We'll now set the VP Approval task to start only if the Director Approval is Approved and the value from the Total $ field is 'Greater than or Equal to' 50,000.
Once we have finished configuring our process (added a recipient to the Excel Import task and added other tasks to the process) and have moved it into the Production status for users to be able to start, we will now show how the Excel Import works...
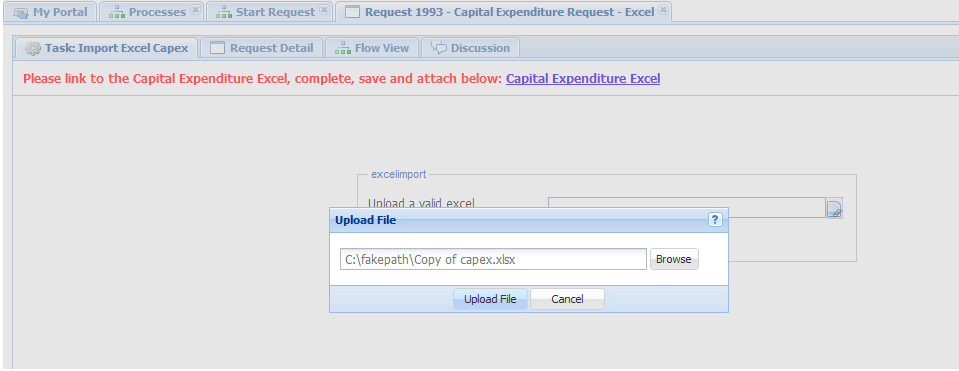
A user will start the request and complete the Excel Import Task by uploading the valid Excel spreadsheet:

When the Excel Import task is executed, all the task recipient (in this case, the requester) needs to do is attach and select 'OK' (Often, process administrators add a help note that will appear above the task to make sure they attach the correct spreadsheet). Administrators can also include a link to the valid Excel spreadsheet within the help note (the user would need to open the file, complete, save on their hard drive and then attach)

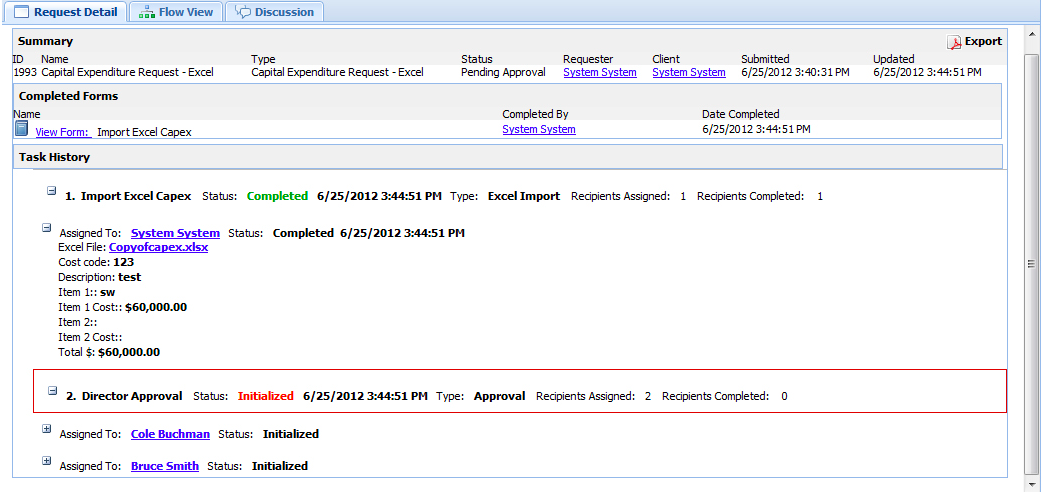
Here, we see that the cell values from the Excel spreadsheet attachment were brought into the web form. All the user needed to do was attach the file.

We can also see that the VP Approval task was started because the $60,000 value in the 'Total' field was greater than or equal to 50,000 as defined in our process.
Comments